How To Make A GIF In Photoshop | Easy Comprehensive Guide
 Today you’re going to learn how to make or edit GIF files in Adobe Photoshop. Although you can find many GIF generators online, such as GIMP or GIPHY, Photoshop CC is still the best GIF making software because of all the tools it comes with. It allows you to be as creative as you want while working with a decent animation palette. Aside from making a GIF file, though, you’ll also be learning more about GIFs today and how they can help you.
How to Make And Edit GIF Files In Photoshop From Media
What Is a GIF?
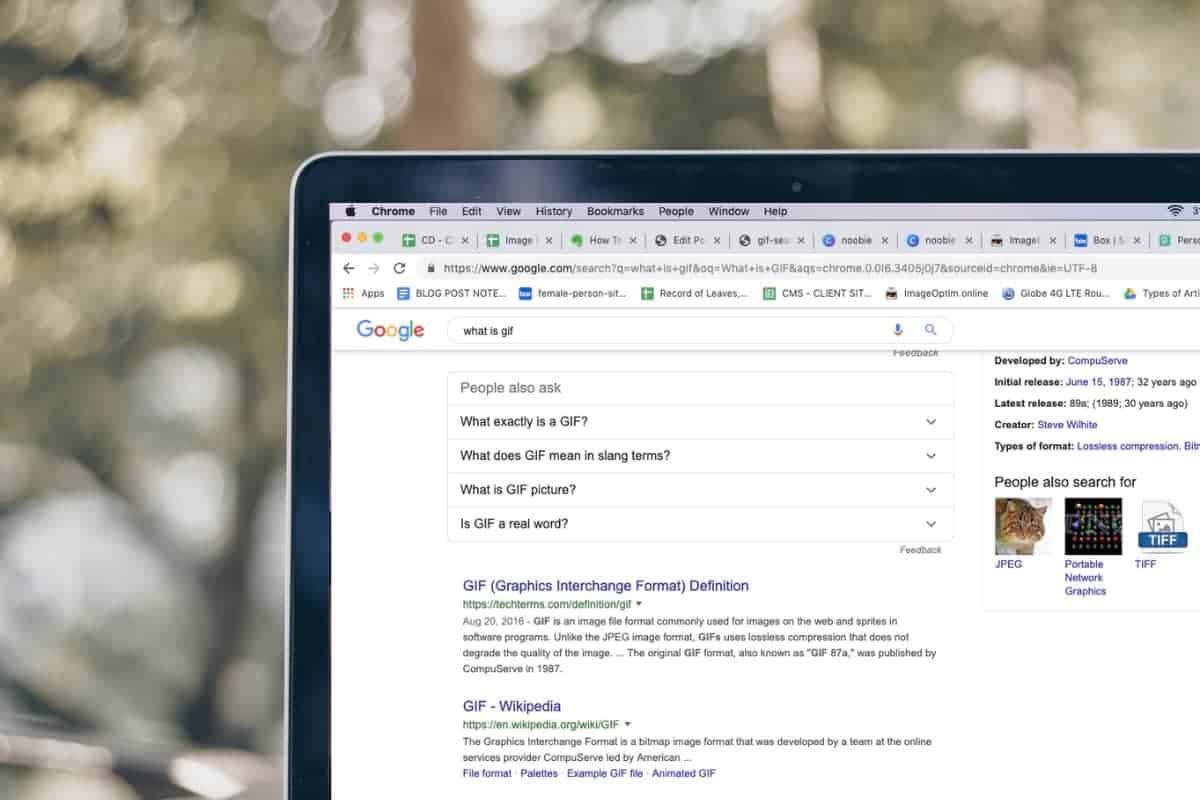
Before we get into the details on how to make or edit GIF files in Photoshop, let’s talk about GIF. There’s a huge chance you’ve seen one before, but you don’t know what it is. GIF stands for Graphics Interchange Format. You pronounce it with a soft g, so it’s like “giraffe.” It’s an image file format (which means when you save the image, it ends with an extension .gif) that lets you create a frame-by-frame animation through layering or combining individual images or frames. It then shows these images in rapid speed, it’s as if the single static image (which is a collection of those images) is moving. Basically, it looks like this:
A GIF file is lossless. Even if you’re using different images and saving the file, the quality remains the same. Furthermore, it usually has a small byte size, which makes it more convenient to share online (although the bigger the file size of your image, the heavier the GIF gets).
GIFs these days have a lot of uses. Apart from making memes and other fun and cool stuff you see on websites such as Buzzfeed or even on your social media sites such as Facebook or Instagram, you can use it for marketing. According to a social media marketing industry report, about 37% of marketers said visuals such as GIFs are the second most important form of content next to blogging. Also, people tend to retain more information if they are paired with images.
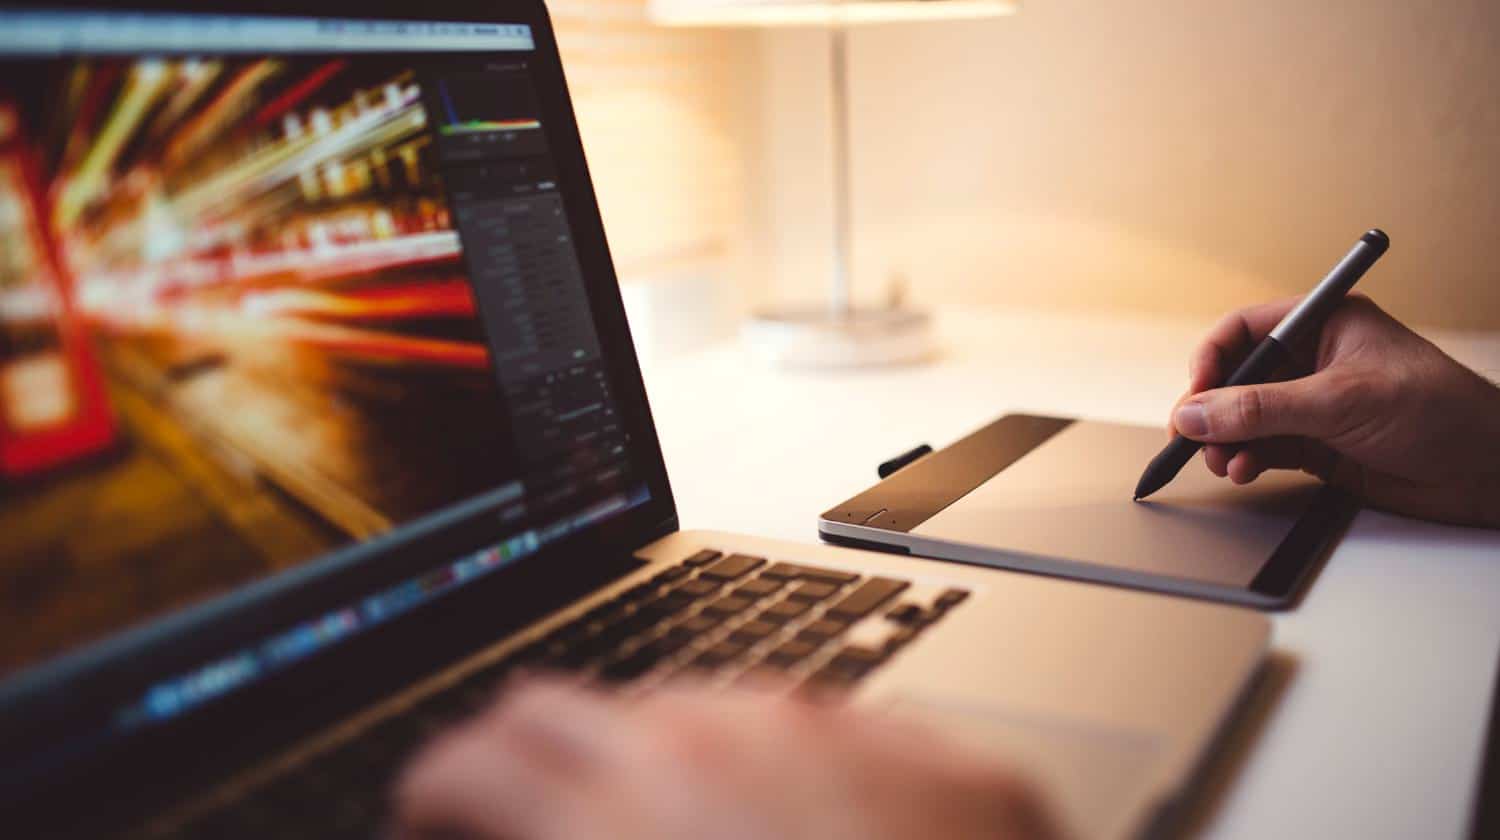
Make and Edit GIF Files from Video and Photo with Photoshop

How do you create or edit GIF files in Photoshop? For this, you have three sources: videos, still images, and your own work. For simplicity, let’s work with videos and still images. Although these are both different media files, the technique on how to convert them into GIF is almost the same. So once you learn one, there’s no question you’ll master the others very quickly.
Steps on How to Produce or Edit GIF Files in Photoshop
Note: This tutorial uses Photoshop CS6, which already has a full suite of tools like the crop box, layer mask, the eraser tool, and the magic wand tool, to modify the frames for animation.
Step 1: Choose the File you Wish to Use
If you want to use a video: It can be a YouTube video, a Vimeo clip, and ones from other video channels. But just to avoid copyright infringement, it’s best if it’s your own video file or video clip. Videos don’t have to be long. In fact, target 5 minutes or lower. This will also save you time choosing the best clips to make into a GIF. If the video is already online, and you don’t have a desktop copy, you need to save it. This link will help you get started.
If you want to use photos: You need a series of still images, although they don’t have to be from the same subject or angle.
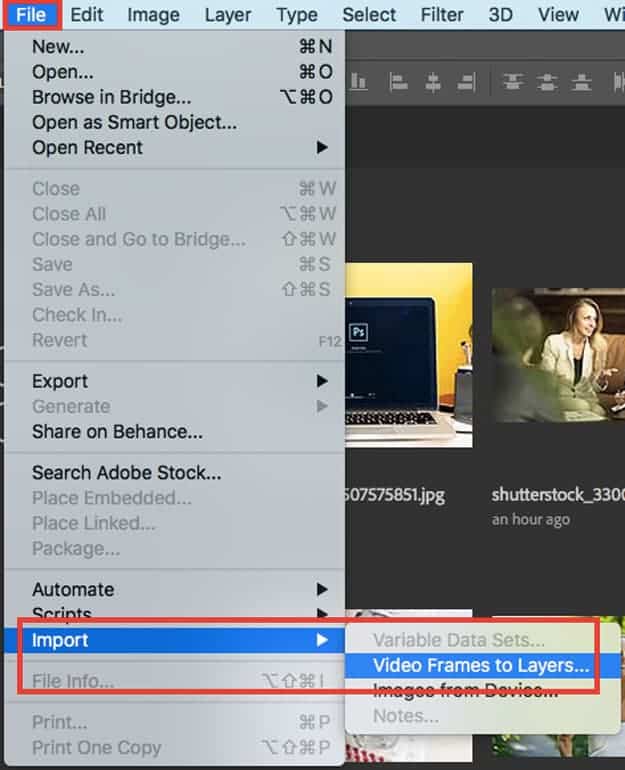
Step 2: Import the File to Photoshop
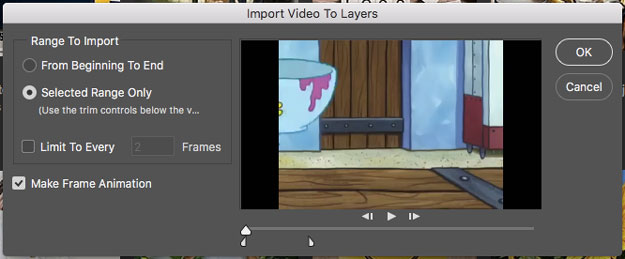
To import means to upload the file to the software so you can start editing it. The process of importing is different when you’re using an image or a video. If you are using a video, you go to File. From the list, choose Import, then Video Frames to Layers. You will then see a few options that include From Beginning to End, Selected Range Only, Limit to Every X Frames, or Make Frame Animation.
- From Beginning to End means you import all the frames.
- Selected Range Only means you select a portion of the video. You just move the scroll thumb to mark your beginning and ending.
- Limit to Every X Frames creates an interval of frames to be imported.
- Make Frame Animation converts the movies to layers then layers to animation. Make sure you check it.
Click OK.
If you’re using photos, you go to File then Choose Scripts in the drop-down menu. Then select Load Files into Stack. Click Browse and choose the photos to make into layers. Press OK.
Step 3: Convert Layers to Frames
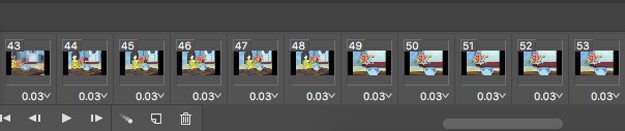
One of the exciting parts on how to make or edit GIF files in Photoshop is converting the layers to frames. Once you do that, there’s no limit to your creativity. After you upload the video, it will appear as layers on your timeline. For your images, go to Windows then select Timeline. Choose Create Frame Animation. Then go back to the Timeline panel, choose to Make Frames from Layers.
You can start playing around with the different layers. They can be different from one another, or you can follow the same pattern. It’s also possible to combine both video and image. For example, you can have a video of a running cheetah then add a background layer of a city from a photo. How cool is that?
Step 4: Loop the Animation
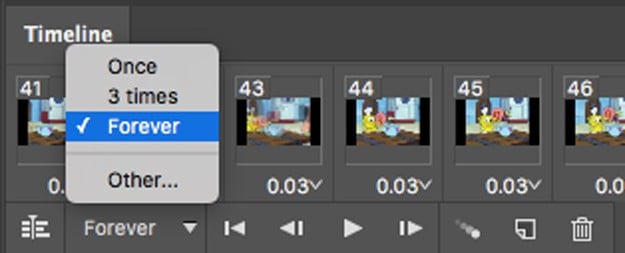
GIFs are best when they’re looped animations (in other words, they keep on repeating). To do that, find the drop-down arrow below the Timeline. When you click it, you should see options like Once, 3 times, and Forever. Select Forever. Press Play or your space bar to preview your GIF.
Step 5: Save the File

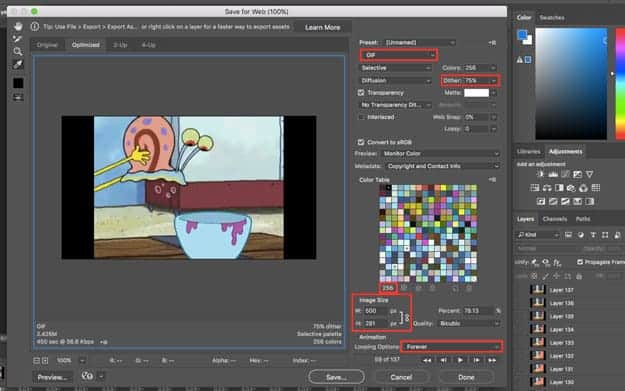
We’re almost done! To save the animated GIF and use it online later, go to File, select Export, and choose to Save for Web. You will then see a few settings. Make your preferred adjustments. Don’t worry about not getting the settings right as you can always preview the GIF before saving it. Scroll down and you’ll see the Play button.
Notes:
- Adjust the image height and width to change the file size. A smaller size ensures the GIF loads faster on the Web.
- Set the loop to Forever.
- You can increase Dither to make the image sharper, but remember, doing so will also increase the size of the file.
- Aim for not lower than 128 for your Colors.
If you’re happy with what you’ve made, click Save.
Would you like to know how to make a GIF in Photoshop using your work? Here’s a short video:
Learning how to make a GIF in Photoshop may sound intimidating at first, but as you can see, it’s not as complicated as it seems. So, go and try it yourself. Enjoy the experience and share your GIF online!
Has this tutorial on how to make GIF in Photoshop helped you? Share your experience and GIFs below!
Up Next: 7 Best 3D Printers Under $500
Editor’s Note: This article has been updated to reflect current style and information. This article was originally published in July 2017.